Changing a bike tube without tire levers might sound like a daunting task, but it’s a skill every cyclist should have in their arsenal. Imagine being miles away from home and getting a flat tire. Without tire levers, you might feel stranded, but with the right knowledge, you can get back on the road in no time.
Not only does this skill save you from potential sticky situations, but it also gives you a sense of independence and confidence on your rides. For this process, you’ll need a few essential tools: a spare tube, a bike pump, and if you have one, a flathead screwdriver. Don’t worry; I’ll guide you through each step.
Gather Your Tools
Before we start, it’s crucial to have all your tools and materials ready. Trust me, there’s nothing more frustrating than realizing you’re missing something halfway through the process.
Tools and Materials:
- Spare bike tube
- Bike pump
- Optional: flathead screwdriver
Identify the Problem
First things first, we need to figure out where the damage is. Start by inspecting the bike tube for any visible punctures or signs of wear. Sometimes, the cause of the flat might be a tiny thorn or a shard of glass that’s hard to spot.
It’s essential to locate the source of the puncture. If you don’t, you risk damaging your new tube in the same spot. So, take your time with this step. Feel the tube with your fingers and look for any sharp objects embedded in the tire.
| Cause | Prevention Tip |
| Thorns | Avoid riding through bushy areas |
| Glass | Stay clear of broken glass on the road |
| Sharp rocks | Be cautious on gravel or rocky terrains |
Remove the Wheel
Alright, let’s get to the nitty-gritty. The first major step is to remove the wheel. Start by flipping your bike upside down, resting it on its handlebars and saddle. This gives you easy access to the wheels.
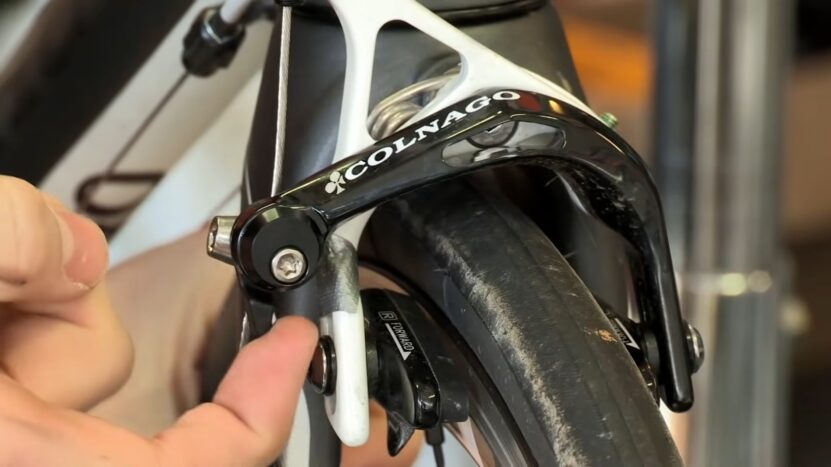
If you have a bike with rim brakes, make sure to release them first. For those with disc brakes, you’re good to go. Next, if your bike has a quick-release mechanism, loosen it. If it’s a bolt-on wheel, you’ll need a wrench to remove the nuts on either side. Gently pull the wheel out, ensuring you don’t damage the brake pads or the derailleur.
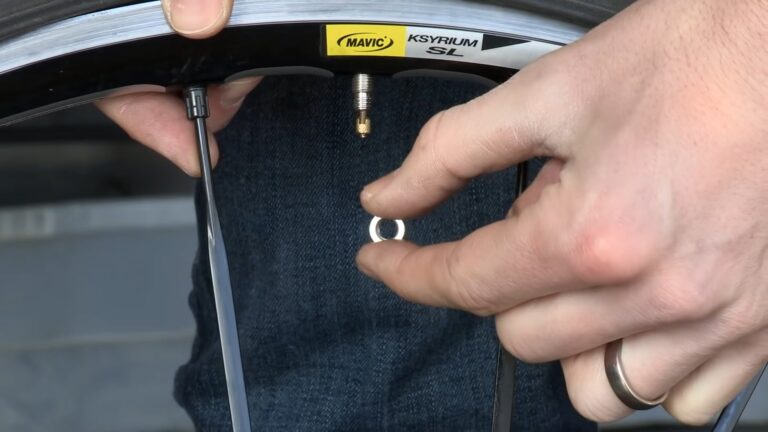
Deflate the Tube
With the wheel off, it’s time to deflate the damaged tube completely. If there’s still some air left in the tube, press down on the valve, letting all the air out. Whether you have a Presta or Schrader valve, the process is pretty straightforward.
Ensuring the tube is entirely flat before proceeding is crucial. A partially inflated tube can be challenging to work with and increases the risk of further damage.
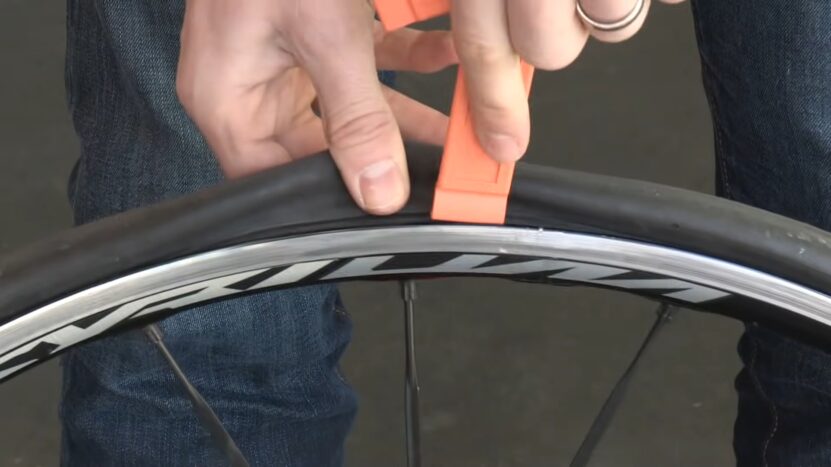
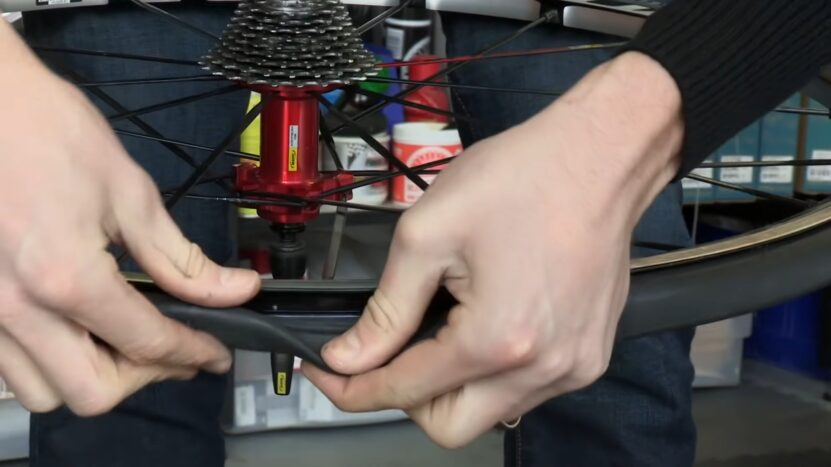
Remove the Tire from the Rim
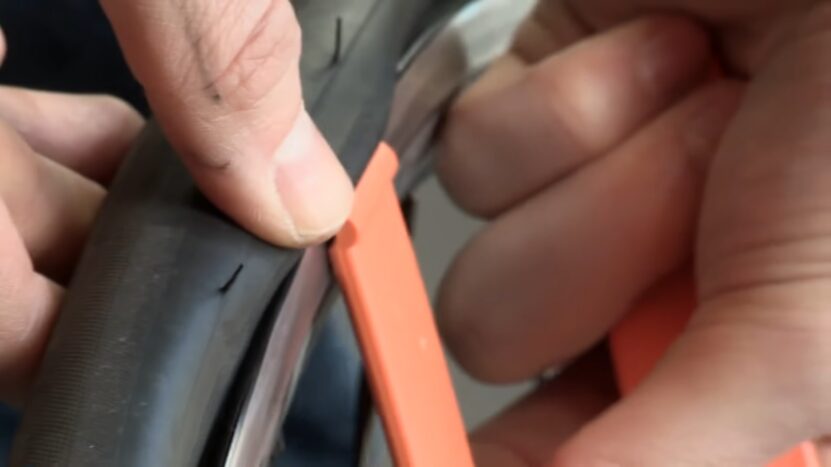
Now, this is where things get a bit hands-on. Without tire levers, you’ll rely on your hands and fingers to do the job. Start by pushing the tire bead (the tire’s inner edge) towards the center of the rim.
This creates some slack. Then, grip the tire with your fingers and begin to push one section of the bead over the rim. Work your way around the tire, gradually pushing more of the bead over until one side is entirely off the rim.
If you’re struggling, this is where the optional flathead screwdriver can come in handy. Gently use it to help pry the tire bead over the rim. But be careful! You don’t want to damage the rim or the tire.
| Tip | Why It Helps |
| Start opposite the valve | Gives more flexibility to the tire |
| Use both hands | Distributes force and prevents pinching |
| Warm up the tire (if it’s cold outside) | A warmer tire is more pliable |
Remove the Tube
Once the tire is partially off the rim, you’ll see the damaged tube peeking out. Gently pull the tube out, starting from the section opposite the valve. Once you reach the valve, push it through the rim hole and fully extract the tube. Lay it aside; we’ll come back to it later.
Now, here’s a step many overlook but is crucial: run your fingers along the inside of the tire. We’re checking for any sharp objects that might have caused the puncture. If you find anything, remove it. The last thing you want is to install a new tube only to have it punctured immediately.
Insert the New Tube
With the old tube out and the tire checked, it’s time to introduce the new tube. First, give it a bit of shape by inflating it just enough so it holds form but isn’t tight. This makes it easier to work with.
Insert the valve of the new tube into the rim hole. Gently tuck the rest of the tube inside, ensuring it sits evenly and isn’t twisted. Be gentle during this process; you don’t want to pinch or damage the new tube.
Inflate the Tube
Now that the new tube is in place, it’s inflation time. Attach your bike pump to the tube’s valve and start pumping. Keep an eye on the tire as it inflates, ensuring it’s seating correctly on the rim and the tube isn’t getting pinched.
Every bike and tire has a recommended tire pressure, usually indicated on the tire’s sidewall. It’s given in PSI (pounds per square inch). Ensure you inflate to this recommended level for optimal performance and safety.
| Bike Type | Recommended PSI Range |
| Road Bike | 80-130 PSI |
| Mountain Bike | 30-50 PSI |
| Hybrid Bike | 50-70 PSI |
Check for Proper Fit
Once you’ve inflated the tube, it’s essential to ensure everything sits just right. Slowly rotate the wheel, inspecting the tire’s seating on the rim. What you’re looking for is a consistent fit all around, with no parts of the tube peeking out.
Feel the tire with your hands. It should feel firm but not rock-hard. Also, check for any pinches or folds in the tube. These can lead to premature wear or another puncture.
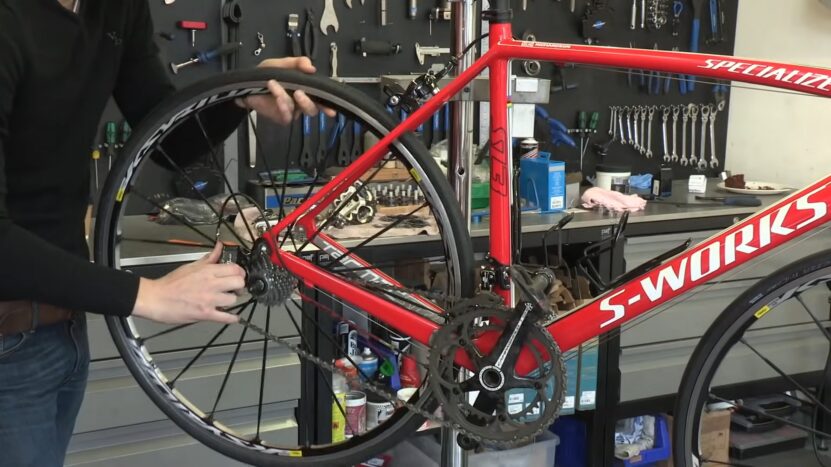
Reinstall the Wheel
We’re almost there! With the new tube in place and inflated, it’s time to put the wheel back on the bike. If you’re working with the rear wheel, remember to align the chain with the smallest gear. Slide the wheel back into the dropouts, ensuring it’s centered.
Tighten the quick-release mechanism or the nuts if it’s a bolt-on wheel. If you released the brakes earlier, don’t forget to reattach them. Give the wheel a spin to make sure it rotates freely without rubbing against the brake pads.
Test the Repair
Before you head out, it’s wise to test your handiwork. Start by giving the bike a gentle shake and listening for any unusual sounds. Then, take it for a short ride around your area. Pay attention to how the bike feels, especially the newly repaired wheel.
Common signs of a successful repair include a smooth ride, no wobbling of the wheel, and the tire maintaining its firmness. If everything feels right, give yourself a pat on the back!
FAQ
Why would I want to change a tube without levers?
You might find yourself in a situation where you have a flat tire but don’t have tire levers on hand. Knowing how to change a tube without them can be a valuable skill in such scenarios.
Is it harder to change a tube without tire levers?
It can be more challenging, especially if the tire fits very snugly on the rim. However, with the right technique and some patience, it’s entirely doable.
Is there a risk of damaging the tire or rim without tire levers?
There’s always a slight risk, especially if using improvised tools like spoons. However, with careful technique and by using your hands, the risk is minimal.
How can I make the process easier?
Ensuring the tire and tube are fully deflated makes the process easier. Additionally, warming the tire (by leaving it in the sun for a bit) can make the rubber more pliable.
Also keep in mind that you should consider your bike’s maximum weight if you don’t want your tires to deflate.
What should I do if I can’t get the tire back on the rim?
If you’re struggling, try starting at the valve and working your way around. If it’s still too tight, it might be worth seeking assistance or using levers.
Wrapping Up
Changing a bike tube without tire levers might have seemed intimidating at first, but with patience and the right steps, it’s entirely doable. By mastering this skill, you’ve not only saved yourself potential future hassles but also become a more self-reliant and confident cyclist.
Remember, practice makes perfect. The more you familiarize yourself with the process, the quicker and more efficient you’ll become.
Safe travels on all your cycling adventures!